
Last updated 10/04/2023
The four main types of Windows device onboarding options I detailed in this blog support different methods to place a Windows computer in an Active Directory (AD) Domain. The technical method being used to join AD is as follows:
- VMware Drop-Ship Provisioning ONLINE uses Microsoft Offline Domain Join (via UEM ACC)
- Microsoft’s OOBE + AutoPilot for Hybrid uses Microsoft Offline Domain Join (via UEM ACC)
- VMware Drop-Ship Provisioning OFFLINE uses an unattend.xml
What all of these methods share in common is that there is only one attempt for the domain join. There is no retry. This blog is a collection of troubleshooting tips to help figure out why it fails.
Understanding Microsoft Offline Domain Join (ODJ)
Microsoft’s official name for the process of using djoin.exe to join a domain is named “Offline Domain Join (ODJ).” The “Offline” portion of ODJ name confuses a lot of people because the Windows computer still needs a connection to the Internet when this process happens, so the computer is not really offline. What Microsoft intended to describe with the name “offline” is that the computer is not on the same network as the Domain Controller when the domain join occurs, hence the computer is offline.
To explain ODJ the following is a summary of what ODJ does and a brief summary of how it’s done. A more detailed look at each of these steps will be discussed later in this post.
| What Happens | How Microsoft does this | How Workspace ONE UEM does this |
|---|---|---|
| A program named Djoin.exe is run to generate a computer account record in AD for a computer not yet on the network. The result is a text file called a blob. | From a Windows Server on the domain, an IT Administrator runs the command djoin.exe /provision /domain | The djoin command is run automatically by the Airwatch Cloud Connector (ACC) following an MDM Enrollment. The resulting blob file is saved in the Airwatch Database. |
| The blob file must be copied to the Windows 10 computer not yet on the network | An IT Administrator copies the blob.txt to the computer or adds the contents of the blob.txt to an unattend.xml (which is consumed during OOBE) | After MDM enrollment completes, a command is triggered to extract the blob from the database and transfer the blob through the Airwatch Cloud Messaging service (AWCM) to the Windows 10 computer. |
| Djoin.exe is run on the Windows 10 device to load the blob.txt | IT Admin runs djoin.exe /requestodj /loadfile blob.txt or this same action is triggered by the Windows OS setup process based on the unattend.xml. | In the previous step UEM used a Microsoft CSP to download the blob which is the equivalent of the Microsoft process without requiring the IT admin to run the command line |
| The final step involves rebooting the computer. | An IT Admin reboots computer, or this reboot is automatically triggering during OOBE by the Windows setup process. | If the UEM device is using Factory Provisioning the reboot will happen as part of the final shut-down step during the Sysprep Audit Mode process. A manual reboot will only be required if you are testing this from an existing Workgroup joined machine |
| After the computer reboot, but before the login screen appears, line-of-site to the DC is established by the VPN App. This enables the end user to use their AD account to logon to Windows. | Pre-login VPN solutions like Microsoft Direct Access or a 3rd party VPN solution is used to establish a VPN connection to the DC to complete this step. | Workspace One Tunnel establishes the pre-login VPN to complete this step. |
| The computer is now joined to the domain and the process is complete | <-- Look left. | <-- Look left. |
Useful log files (in no particular order):
What follows are a number of log files that will help with troubleshooting.
| Source | Log File | Notes |
|---|---|---|
| ACC | C:\VMware\AirWatch\Logs\CloudConnector\CloudConnector.log | Needs to be in Debug mode |
| Windows 10 Device | %windir%\debug\Netsetup.log | Records Domain Join status |
| Windows 10 Device | HKLM\Software\Airwatch\ | Prior to the Blob being applied to the device, the Windows Registry will show the domain join configuration in several keys including DomainJoinConfiguration, DomainJoinType, DomainName, HasDomainJoined and a few others |
| Windows 10 Device | C:\VMware\AirWatch\Logs\FactoryProvisioning.Service.log | The Factory Provisioning Service records status messages in this log file |
| Windows 10 Device | C:\VMware\AirWatch\Logs\Factory Provisioning Services/Website/VMware.Workspace One.FactoryProvisioning.API.log | This log shows what happens during the runtime of the Factory Provisioning Windows API responsible for receiving the PPKG package generation request |
| Windows 10 Device | C:\VMware\AirWatch\Logs\Factory Provisioning Service\Services\WMware.Workspace One.FactoryProvisioning.Service.exe.config | The configuration file used for Factory Provisioning |
| Windows 10 Device | C:\Windows\Panther\UnattendGC\setupact.log | It's tempting to look at c:\Windows\Panther\setupact.log but that will not show you much. The UnattendGC subfolder has the file you are looking for. Search the file for DJOIN.EXE to see what's going on |
VMware maintains a comprehensive list of all of the Workspace ONE UEM log files for all platforms and services at this link.
More Details:
For ODJ, the Airwatch Cloud Connector (ACC) is responsible for delivering the djoin.exe domain join blob to the computer. It is critical that the ACC remain updated with each UEM Console upgrade in order to ensure the domain join operations are working as designed. While the ACC includes an “Auto-Upgrade” checkbox but if you are like me and have never seen an ACC Auto-upgrade work properly, you’ll be manually triggering the ACC upgrade direct from the Windows server via the use of the ACC .MSI.
If you use the ACC .MSI to upgrade an existing ACC, by design, the MSI upgrade logic will remove any customizations to the ACC service “Login As” settings as part of the installation. When the “Login As” service gets reset to local system, this will break the ACC’s ability to complete the djoin.exe process (which required changing the “Login As” for the service to an account that has delegated access control to join computers to the domain). It is imperative that after the ACC .MSI finishes the ACC upgrade to then stop the ACC Service and change the “Logon As” back to the proper account for domain join to function and then restart the ACC service.
Test, Test and Re-Test
The remainder of this blog describes some common test scenarios recommended to ensure the domain join process is functional.
Test 1: Does basic MDM Enrollment work?
If this is your first time enrolling a Windows 10 device in UEM step away from this blog and come back when you have successfully enrolled a Windows 10 device in Workspace ONE UEM. This blog assumes Workspace ONE UEM and the Airwatch Cloud Connector (ACC) are functional and that all of the pre-reqs are in place for the basic Workspace ONE UEM Console to device MDM based functionality. Before continuing you should complete the following:
- In the Workspace ONE UEM Console, configure at least 1 Windows 10 Profile to auto deploy to a Windows 10 device
- In the Workspace ONE UEM Console use the Enterprise App Repository (EAR) to configure at least 1 Windows application to auto deploy to the device. I recommend Google Chrome or Adobe Reader. They are small, easy installs and illustrate that the basic Device to Server communications are working properly.
- From a Windows 10 computer not yet enrolled into Workspace ONE UEM, open Start Menu > Settings > Accounts > Access work or school > and choose Enroll into MDM only. This enrollment method will validate that email auto-discovery is working. If you are using Microsoft Azure it will confirm that the connection between UEM and Azure is working and if you have an IDP like Ping or Okta integrated with either UEM or Azure, it will validate you have all of this setup properly.
Test 2: Windows 10 in a WorkGroup using Ethernet (NO WIFI)
In this test we are removing a few dozen things that can go wrong just to confirm all the configuration of the domain join operation is working as designed. Recommendations for this test:
- This test must be completed on the same network as your Domain Controller.
- Use an Ethernet connection (not Wifi and certainly not a Mobile Hotspot) to complete this test.
- Use a Virtual Machine with Snapshots. If you need help creating a VM, reference my blog, but SKIP the part about registering the device with AutoPilot. Here’s a link: How to build a VM
- The Windows computer should be configured in Workgroup Mode
- Create the Windows 10/11 VM and complete OOBE using the Workgroup method.
- Login to the Windows 10/11 VM as the local administrator.
The requirement to use a local administrator account is because later in this process you will install software that requires local admin rights or the install will fail. - Get the Serial number of the windows 10/11 device by running the Powershell
gwmi win32_bios - From the Windows 10/11 VM, download the Workspace ONE UEM Intelligent Hub from https://getwsone.com and save the AirwatchAgent.msi to C:\temp. DO NOT start the installer!
- On your host machine launch a web browser and navigate to your Workspace ONE UEM Console. The next step is pre-registering the device as follows:
- Navigate to Devices > Lifecycle > Enrollment Status
- Choose Add > Register a Device
- In the User Search Text you will be linking the end user of the device to the device record being created in UEM. For example if the computer will be used by Peter Parker, Peter Parker is the user to search for in this step. Do not use a staging account in this step.
- Under the Search Results the column named “Action” will have a Select button. Click “Select” and the page will refresh displaying the user’s details
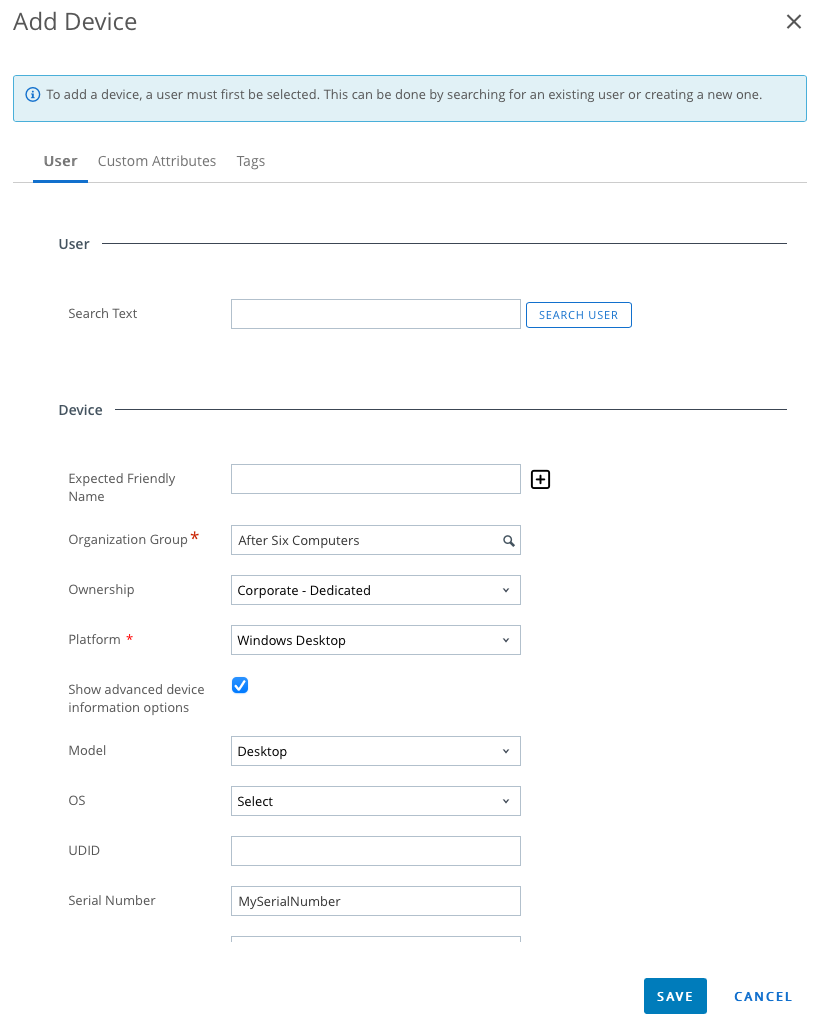
- Under the Device section make the following changes:
- Platform: Windows Desktop
- Check the box next to “Show advanced device information options”
- Model: Desktop
- Serial Number: Supply the Serial Number for the device
- Scroll down to the Messaging section and change the message Type to None
- At the top of the page choose the Tab named Tags
- Click Add
- Select the Tag used to build the Smart Group where the Domain Join is assigned. In my example the tag is named “DSP”
- Choose Save
- Back on the Windows 10/11 VM, run the AirwatchAgent.msi and complete the enrollment using the username defined. Here’s a sample command line enrollment to use if you want to automate this step
(update the command line to your environment).msiexec.exe /i c:\temp\AirWatchAgent.msi /quiet ENROLL=Y IMAGE=N SERVER=YourDSServerName.awmdm.com LGName=YourOG USERNAME=YourUsername PASSWORD=YourPasswordNoQuotesRequired DEVICEOWNERSHIPTYPE=CD ASSIGNTOLOGGEDINUSER=N DOWNLOADWSBUNDLE=false /log c:\temp\airwatch.log - The next step is to connect to the ACC Server and open the ACC log so that you can see if the djoin.exe process functions. If you followed Part 1 of this blog series you already have the ACC logs verbosed. The log file is found in:
C:\VMware\AirWatch\Logs\CloudConnector\CloudConnector.log - Search the CloudConnector.log file for the entry “GetOfflineDomainJoinBlobs”
- If djoin.exe worked as expected you will see an entry like this:
2021/04/15 13:33:23.860	UEMCONNECTOR	368741b3-4817-438e-90bf-02c77843c861	[0000000-0000000]   (33) 	Info 	AirWatch.CloudConnector.AccServiceListener.ProcessServiceRequest/1	Processing Query request AirWatch.CloudConnector.DirectoryService.IDirectoryService:GetOfflineDomainJoinBlobs
2021/04/15 13:33:23.876	UEMCONNECTOR	5c46a87f-8488-48b5-8566-3f2321397cd7	[0000000-0000000]   (33) 	Debug	AirWatch.CloudMessaging.Client.AwcmClient+<SendMessageRetryAsync>d__74.MoveNext	Sending Idle message to AWCM: https://awcm1688.awmdm.com/awcm, MessageId: ce190bd2-511b-4427-b964-a4e06bf838bc, CorrelationId: , OriginId: 458c520c-638d-45f5-95ad-99ba6d9e5233(https://cn1688.awmdm.com/789/acc), DestinationId:
2021/04/15 13:33:23.892	UEMCONNECTOR	368741b3-4817-438e-90bf-02c77843c861	[0000000-0000000]   (13) 	Debug	AirWatch.CloudConnector.DirectoryService.DirectoryService.ExecuteDjoinCommand	Executing ODJ command - djoin /PROVISION /DOMAIN "lab.aftersixcomputers.com" /MACHINE "AS-7812008" /MACHINEOU "OU=UEMDomainJoin,DC=lab,DC=aftersixcomputers,DC=com" /SAVEFILE "odjBlob-AS-7812008.txt"
2021/04/15 13:33:25.433	UEMCONNECTOR	368741b3-4817-438e-90bf-02c77843c861	[0000000-0000000]   (13) 	Debug	AirWatch.CloudConnector.DirectoryService.DirectoryService.ExecuteDjoinCommand	Result of ODJ command:

Provisioning the computer...

Successfully provisioned [AS-7812008] in the domain [lab.aftersixcomputers.com].

Provisioning data was saved successfully to [odjBlob-AS-7812008.txt].


Computer provisioning completed successfully.

The operation completed successfully.


2021/04/15 13:33:25.465	UEMCONNECTOR	368741b3-4817-438e-90bf-02c77843c861	[0000000-0000000]   (13) 	Debug	AirWatch.CloudConnector.DirectoryService.DirectoryService+<GetOfflineDomainJoinBlobsAsync>d__68.MoveNext	Returning successful response to ODJ blob request for 1 resources.
2021/04/15 13:33:25.465	UEMCONNECTOR	368741b3-4817-438e-90bf-02c77843c861	[0000000-0000000]   (13) 	Info 	AirWatch.CloudConnector.AccServiceListener.ProcessServiceRequest/1	Sending reply message
2021/04/15 13:33:25.465	UEMCONNECTOR
If the CloudConnector.log file does not show the message:
Computer provisioning completed successfully. The operation completed successfully.
then use the ACC log file as your first path to troubleshoot. I don’t have a lot of failures with this process so I’m not sure exactly what else will show up here, but if you have samples to share, please share them in the comments below.
Back on the Windows 10/11 device, as far as Workspace ONE UEM is concerned the domain join has completed, but the Windows OS does not know this yet. The Windows OS won’t know to switch to the domain model until a reboot. It’s a bit frustrating that there is no visual indication that the device needs a reboot, as the IT Admin you just have to remember this is the next step. Before the reboot, you may be able to confirm the UEM side of the equation worked on the device by opening the Windows registry editor and navigating to HKLM\Software\Airwatch\ where you might see a number of entries associated with the Domain Join including the name of the Domain being joined and the current status. Do not panic if you do not see these registry entries because the entries are removed if the domain operation was successful. I suspect the removal of these registry entries happens as part of the device reboot (more testing required).
If you have not done so already, on the Windows 10/11 device you should now trigger a device reboot to complete the Domain Join process.
Upon reboot, the expected result is that the Windows login screen will change to reflect the domain login page. You you will see the “Other User” option in the lower left of the login screen. Choose “Other User” and you will see the login screen ask for a username, but you will also notice that it will have your domain name automatically selected.
Did the computer name change? Remember that part of the Domain Join configuration in the Workspace ONE UEM Console also includes renaming the existing computer to whatever standard you defined in the configuration. Login to Windows 10/11 as a user on your domain and validate from the System Settings that the computer name matches the name defined in the Domain Join Configuration. You’ll also see in the Control Panel > Accounts page that the machine is joined to the domain. If you used the command line installer provided above, what you will not see is Workspace ONE UEM assigning the device to the end user that just logged in. This is on purpose based on the flags used in the command line.
If the domain join fails, there should be a log file that shows why. To troubleshoot the failure, log back into the Windows 10/11 device as the local administrator and pull up the %windir%\debug\Netsetup.log file.
This completes Test 1 and if successful it proves that you properly configured the ACC and the UEM Domain Join configuration and that over Ethernet with line-of-site to the Domain Controller the Domain Join works successfully. Pat yourself on the back for a job well done.
If you plan to continue your testing with a VM I recommend resetting the VM using the following process before beginning the next test:
- In the UEM Console navigate to Devices > List View >
- Select the Win10/11 VM > Select More Actions > Select Enterprise Wipe
- On the Win10/11 VM ensure the Enterprise Command Succeeds by watching for the Toast Notification
- In the UEM Console Navigate to Devices > List View >
- Delete the device record for the VM from the console
- Navigate to Devices > Lifecycle > Enrollment Status >
- Select the device record for the VM
- Choose More Actions > Reset Token
- On the Windows 10/11 VM revert to your snapshot or run through an OS reinstall to get you back to a clean OS install.
Test 3: Repeat Test 2 using a staging account
All of the automated Windows onboarding flows use a staging account to enroll into Workspace ONE UEM. It is only after the domain join occurs and the AD user account successfully logs into Windows that UEM flips the staging user over to the end user. For this flip to happen the computer must have line of site to the domain controller during that first Windows 10 logon. Line-of-site to the DC is the function of either being on the same subnet as the Domain Controller, or using a VPN to establish that connection. A number of failures in this process are related to the staging user not being able to enroll the device so this test is all about the verification of the staging account.
In the Workspace ONE UEM Console, there are two staging accounts created by default for Windows devices. Both are located in the UEM Console at Groups & Settings > All Settings > Devices & Users > Windows > Windows Desktop > Staging & Provisioning.
The first staging account listed is used for command line enrollment and Drop Ship Provisioning (Offline). The second staging account on this page is specific to Drop Ship Provisioning (Online). In this test, using the staging account UPN and password, repeat everything you did in Test 2 except that in Step 7 adjust the command line to use the first staging user listed on the UEM configuration page and change AssigntoLoggedInUser to Y as shown here:
msiexec.exe /i c:\temp\AirWatchAgent.msi /quiet ENROLL=Y IMAGE=N SERVER=YourDSServerName.awmdm.com LGName=YourOG USERNAME=STAGINGUSER PASSWORD=STAGINGUSERPASSWORD DEVICEOWNERSHIPTYPE=CD ASSIGNTOLOGGEDINUSER=Y DOWNLOADWSBUNDLE=false /log c:\temp\airwatch.log
This test may seem redundant, but trust me, there are plenty of things that can still break at this point.
If all goes well, the change you are expected to see in the UEM Console is that the Device is now assigned to the AD End User that logged in.
If something breaks at this point check if the Intelligent Hub is able to complete the switch from staging user to the end user. Logs to assist with this portion of troubleshooting include: %ProgramData%\AirWatch\UnifiedAgent\Logs\TaskScheduler.log
%ProgramData%\AirWatch\UnifiedAgent\Logs\AWProcessCommands.log
You’ve reached the end of Test 3. At this point the computer has been renamed, the domain has been joined, the user has logged in, and Workspace ONE UEM has assigned the device to the end user.