
Actually we built it in the year 2024, I’m just late on posting this blog!
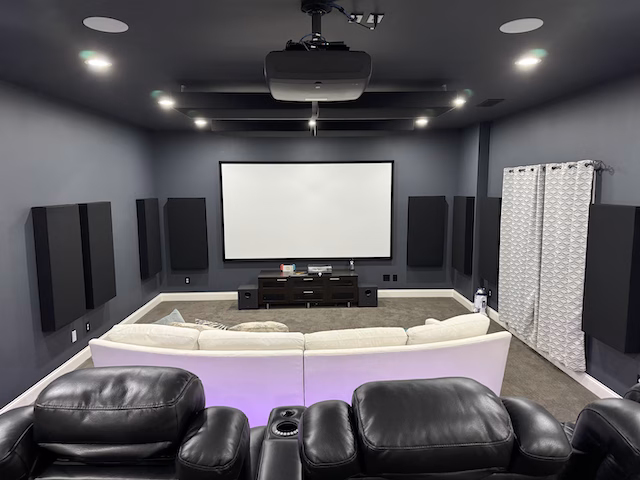
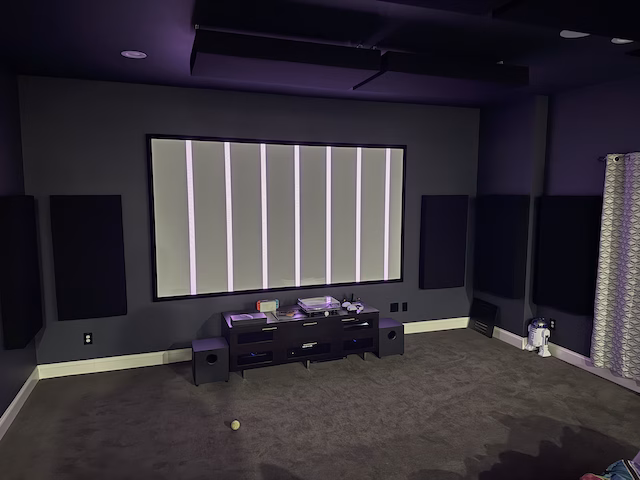
I’ve always dreamt of having a home theater. In 2024 this dream came true! The end result: 4K UHD Laser Projector with a 133″ screen and Dolby Atmos 7.2.4 audio.
If you’ve never played Fortnite or Spiderman 2 on the Sony Playstation 5 (PS5) at 120 FPS on a 133″ screen, your life is just not complete. And kudos to the sound mixer for Fortnite which supports 7.1 surround audio. The experience is specular! Movies are pretty sweet as well!
Here’s how we got there.
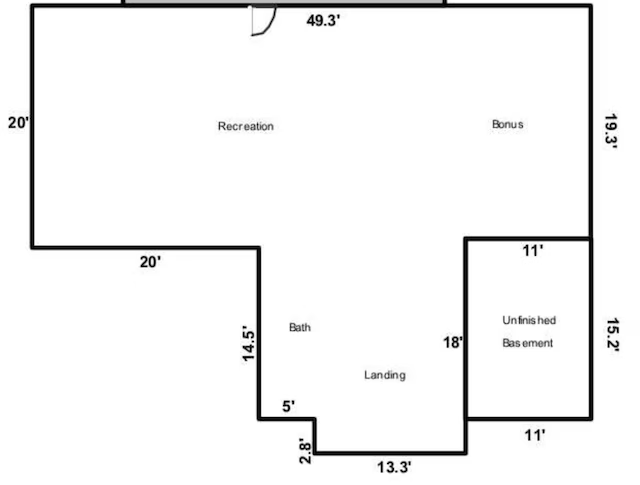
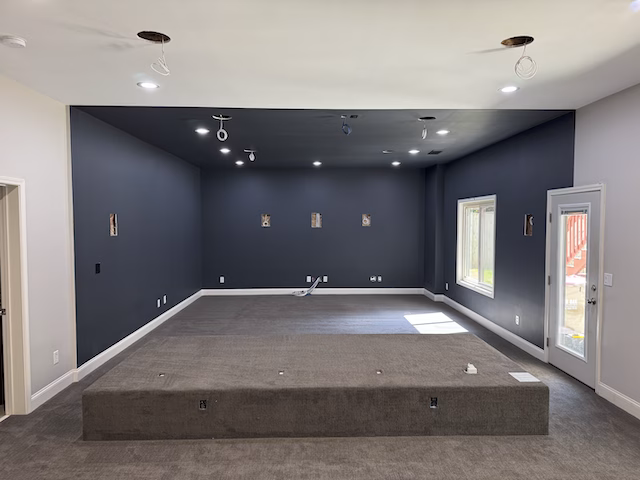
When we were house shopping I shared my long-term vision with Cherish of wanting a home with a basement large enough to build a home theater. My preference was to have the basement unfinished, which would allow all the fancy in-wall acoustic treatments to isolate the sound to the theater as much as possible. We did not find the unfinished basement, but the finished basement in the house does have a room that is 20 feet wide 9.5 feet tall and 35 feet long which ended up working out great.
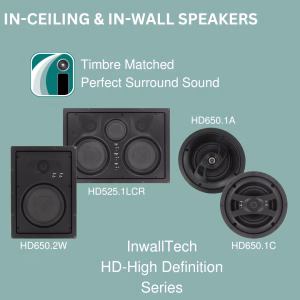
The primary design constraint for the theater (excluding the cost) came from the width of the room and drove most of our decisions. The first decision being what type of speaker layout and types of speakers did we want to use. I knew I was going Dolby Atmos. We decided to go all-in on in-wall speakers. We bought a set of speakers and subs from InWall (https://inwallstore.com) using what they call the Forest Park Dolby Atmos 7.2.4 set of speakers as shown below.
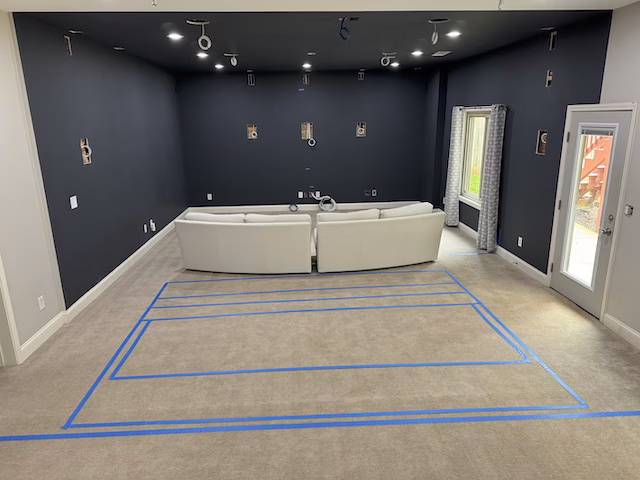
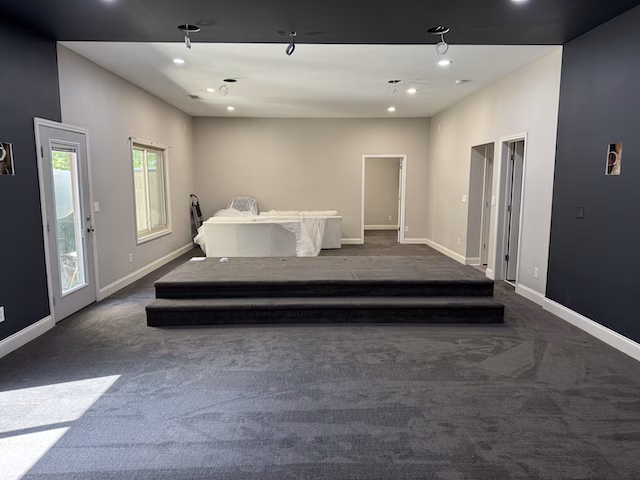
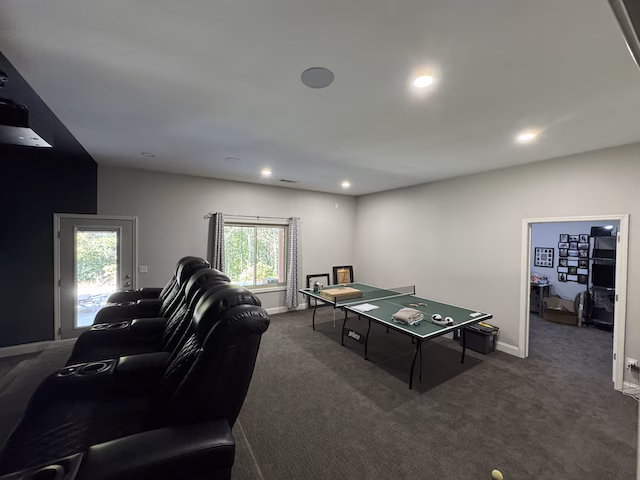
Referencing the speaker diagram below, that sofa is visually in the center of the room. In our house the room entrance is a hallway positioned in the lower left of this layout and on the lower right is the exit to the backyard. While floor standing speakers at the front of the room by the screen would have worked, anything on the floor of the sides or back of the room would have prevented a comfortable entrance. Behind this sofa is the remainder of the room, which currently is the game room where we have our ping-pong table setup. The idea is that people can be playing pinball in the game room and still be able to watch whatever is playing in the theater. Having ping-pong balls flying around the back of the room meant floor standing speakers were not going to work.

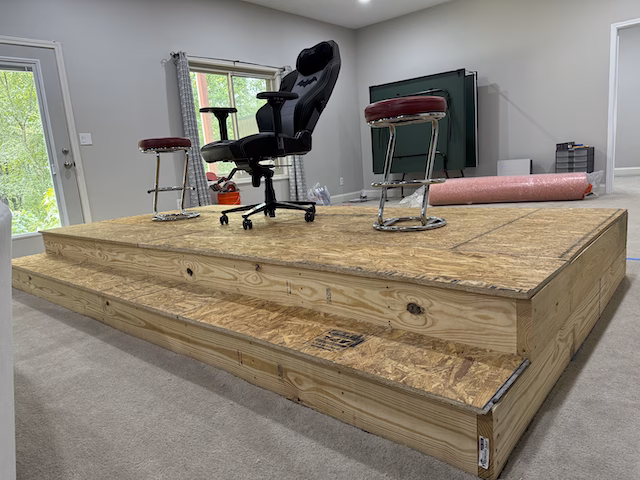
The 15-feet width of the room also limited us to a max of 4 theater chairs per row. The end result is that we ended up with two rows of seats, 4 theater chairs on the back row on a riser, and a curved sofa that technically can fit 6 people (if you all like each other). In practice the sofa has become Cherish and Milo’s bed where they both stretch out full-body lying head-to-head and promptly pass out … usually about 10 minutes into whatever movie we start.
A large portion of the cost of this theater is due to the fact that we expanded the project to encompass the entire basement which includes my office, the entrance way and the staircase. Behind the walls things were done to accommodate for things you don’t see in the photos which meant lots of drywall cuts and repair, repainting and all new recessed lighting. To power the room, we added three dedicated circuits to separate the power to the projector, the power to the lights, and the power to the equipment. In the adjacent entry room we also added a dedicated circuit for a future wet bar we are going to put in. This required our electrician to completely re-wire most of our existing electrical panel, at no small expense. At this point the panel was already pushing its limits due to the Tesla and the Server rack. We originally were going to have to put in a sub-panel, or replace the panel with a larger one, but ultimately they found a way to make it work.
All the recessed lighting are colored Philips Hue lighting. This lighting extends into my office and out into the adjoining entry way. The entry way got new flooring, as did the stairs and the existing carpet in all the rooms was replaced. We repainted the basement, splitting the colors into the theater side and the game room side, an effect we love when you walk into the space. While the photos above are in full light, when the lights turn off this paint color makes the entire wall pitch black and just makes the picture pop. I found the color on Pinterest…. here’s the details… and it turned out amazing!

As to the windows in the room we debated this a bit earlier in the year when we replaced all the windows in the house. We decided at that point to keep the windows in the room and to use black out curtains. This works great, but the exit door has a glass panel with built-in window shades that simply wasn’t cutting it for blacking out the room. Long term we will replace the exit door with a door with no glass, but in the short term we added blackout window film to the door completely blacking out this glass. This is working out great.
After spending just over $24,000 in room prep expenses (excluding the cost of the couch), we had a room ready for a theater. Now we just needed to buy the equipment and seats.
The chairs we picked are the Revelation line from Audio Advice ( https://www.audioadvice.com/products/revelation-home-theater-seating-audio-advice-2-chair-row ). Here they are installed and powered on the riser with the Philips hue under stair colored lighting:
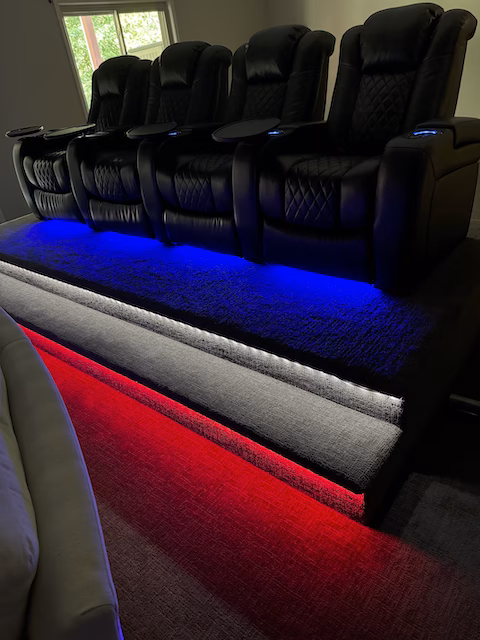
We love every aspect of these chairs except one annoying feature:
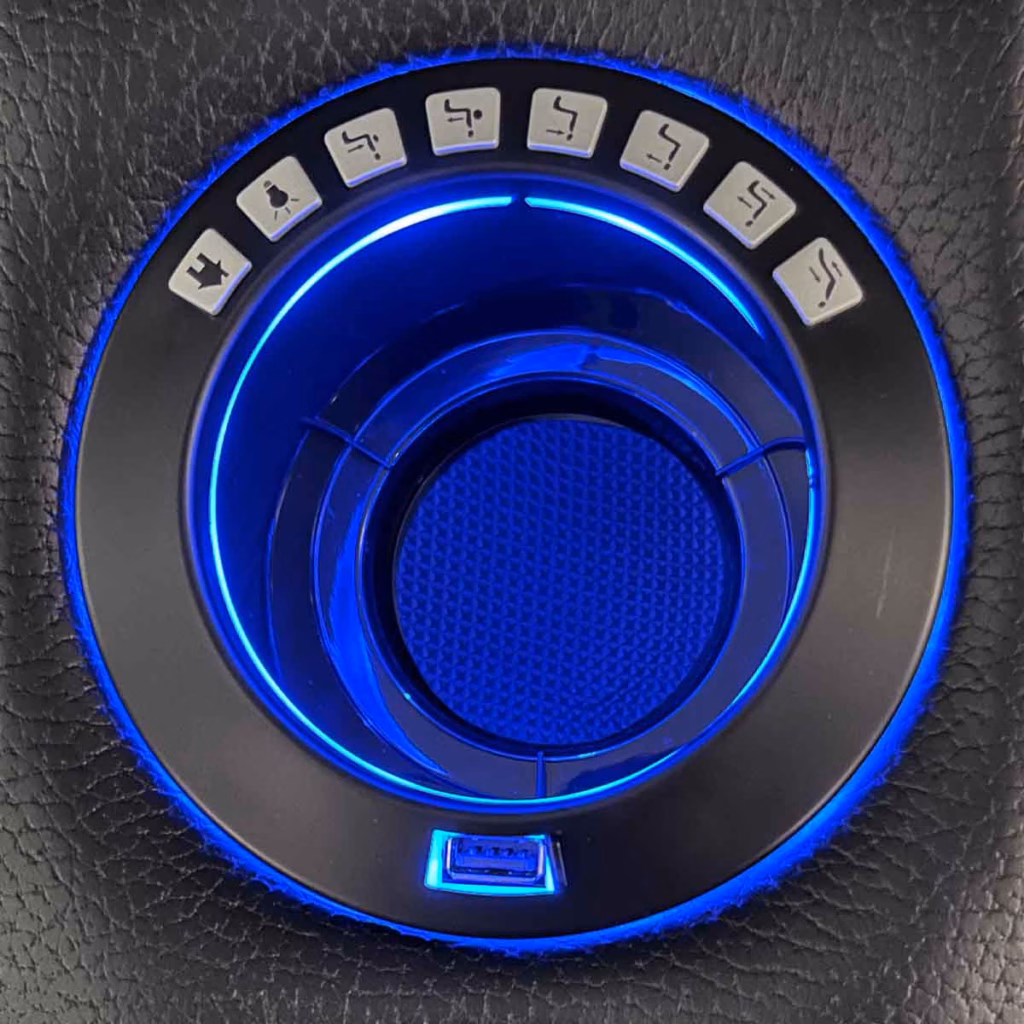
What you are looking at is the cup holder in the chair. It’s got a USB-A port for charging your phone while you watch the movie, and all of the controls to adjust the seat are in a fanstatic spot. Do you know how you can tell this photo was taken with the lights on? Because when the lights go off, the LED does not light up ANY of the control buttons. Sure you can see where to place your cup, but good luck pushing the right button to lower your seat. Instead of individually back lighting each of the buttons this single ring of light is on display. No one can read what any of the buttons do in the dark. As the homeowner, eventually muscle memory covers us for adjusting things, but every time we have a guest over we have to spend a few minutes with them introducing each of the buttons, when the lights are on, because as soon as we turn off the lights no one can use the damn buttons in the dark. This is the single worst design decision about this entire product and I wish I had a way to solve it short of buying all news chairs.
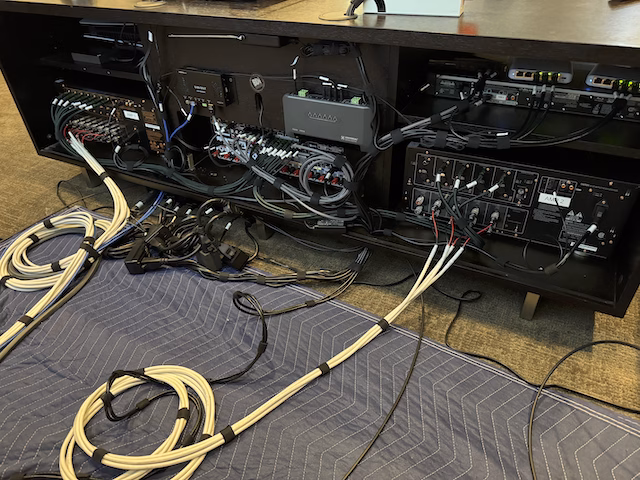
As to equipment, we hired Magnolia Home Theater (The Best Buy company) to handle the choice of equipment and the equipment installation. I did choose the Epson LS12000 projector, but left the rest of the technical details to the Magnolia team. We went through a few iterations based on our remaining budget and in the end came up with the following:
Visuals:
- Projector Screen: 133″ Acoustically Transparent Screen from SI (Model number FT133PWAT)
- Projector: Epson Pro Cinema LS12000 4K Pro UHD Laser Projector
Audio:
- Receiver: Denon AVR-X4800H (125W x 9) 9.4-Channel with Heos
- Marantz MM7055 700W 5.0 Channel Power Amplifier
- Marantz MM8077 7-Channel Power Amplifier
- 13 Acoustic panels from GIK Acoustics (244 Bass Trap with FlexRange (5.25″ thick))
Misc
- Two AC Infinity Aircom T8 Receiver and AV Cooling Blower System, Rear Exhaust 17″
- AudioQuest PowerQuest 303 12-outlet surge proctor and linear Power Conditioner
- Fibercommand PureFiber Ultravision HDMI 2.1 48Gbps 4K 120hz HDR Bundle Cable
- MX-1400 Universal Remote Control with Alexa voice assist
So how did it turn out….

It took us just under five months to complete the project, much of this shipping delays where things like the projector screen took six weeks to build. Once it was up and running it took us a couple of months of sorting out some of the kinks to start making some minor tweaks.
The first tweaks were to the acoustic panels. We were one short on the left wall which is more cosmetic than functional so we fixed that. Originally there were four on the ceiling but we found they were absorbing too much of the in-ceiling Atmos sound effects so we removed two of the panels to open up the space a bit more. This made a huge difference. We currently have zero on the game room side and we have some plans for the future on this side. We will see what the future budget holds.
The speaker grills for the in-wall speakers are originally white. We painted them in the same custom color as the theater walls to blend in. In full brightness they don’t blend in perfectly, but as soon as the lights go off it’s practically impossible to know they are there. Huge visual improvement. We want to do the same with all the Hue recessed lighting, but Reddit is full of mixed results for people who have attempted this and I’m not pro when it comes to painting. I only have a couple of spares to experiment on so we will see.
We started with the projector being connected to the receiver via Cat6a ethernet using a Savant HDMI Extender. For watching movies or TV, this worked great, but trying to get 120FPS on the Sony Playstation 5 proved to be the downfall of this technology so we replaced the connection with the Fiber Command fiber cable. What I thought would be isolated performance improvements to the PS5 turned out to be massive improvements to every aspect of content switching. When I would stop gaming and try to change over to the watch a movie, the screen would go blank while the projector and receiver sorted out their relationship. It always took forever. Moving to fiber, the handshakes are instant.
In recent months we shifted focus away from the theater room directly and began work on the entrance to the home theater. No home theater is complete without a popcorn machine so we started there. We decided to do a small movie poster setup. The Superman movie poster is in a Glowbox (https://glowbox.shop ) which is tied to a motion sensor so it comes on whenever someone begins walking down the stairs and then turns off again after the person makes it into the theater. Eventually a second Glowbox will be in the space next to it and a 3rd Glowbox will be to the left of the popcorn machine. While I have the posters ready to go for these future Glowbox displays, the Glowboxes are not cheap so I’m having to save up for those.
After seeing a neighbors house, I decided to copy him, so I’m using a TV for a digital movie poster experience, shown below with the Curious George poster. What happens here is that anytime someone starts a movie on Plex the poster will change to display what is currently being played. If no one is playing a movie, it randomly picks a poster to cycle through every hour. So far I’m loving this experience. I’m also pairing this with an Xbox controller for a vertical arcade machine. I’ll post more about this in another blog. For now we just continue to enjoy having friends and family over for viewing parties.
